Pages

Sunday, November 17, 2013

how to...artsy doodle backgrounds!


Step 1:  Scrape a bit of paint onto card-stock and allow to dry.


 Step 2: Russell around your craft room for those old  foam stamps. Apply paint to then and stamp. 


Step 3: Grab a shaped masked and doodle pen. Randomly doodle  assorted sized circles over your stamped background. 


 Step 4: Add extra detail to your doodled circles using a assortment of colored gel pens.


Step 5: Add an assortment of washi tapes.


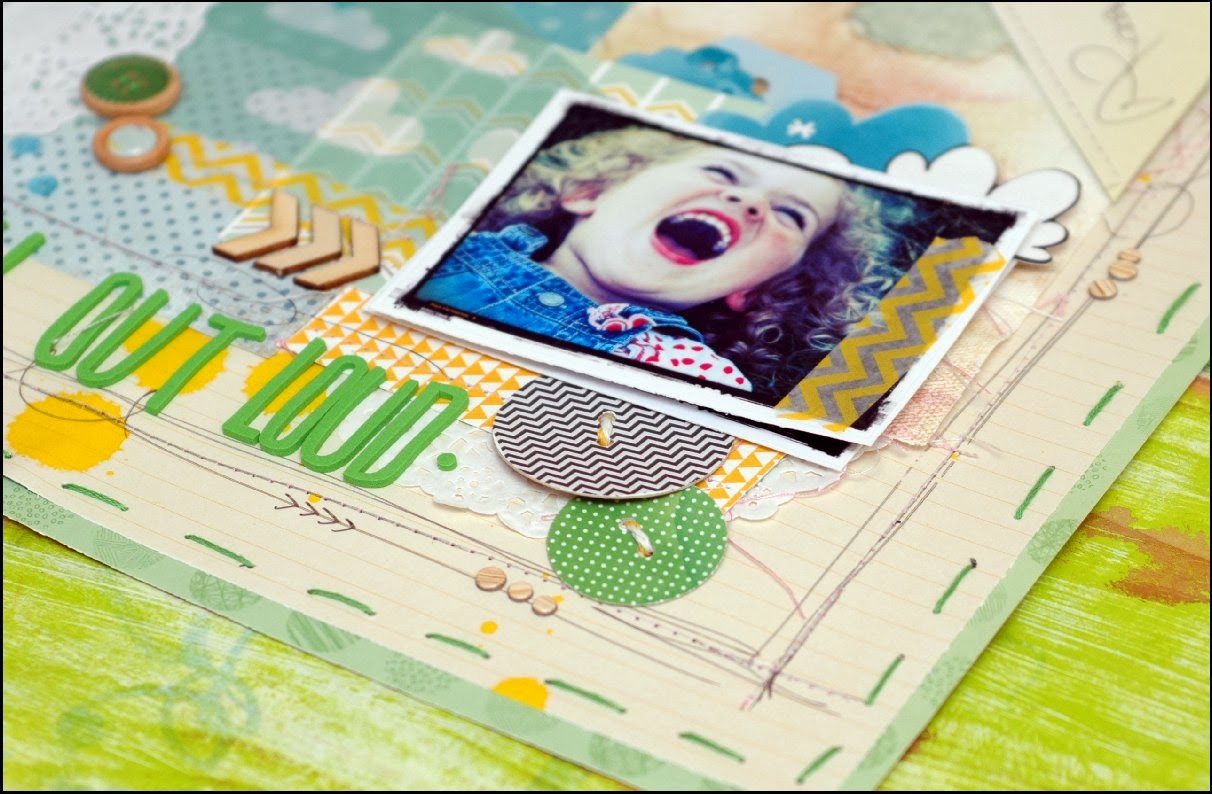
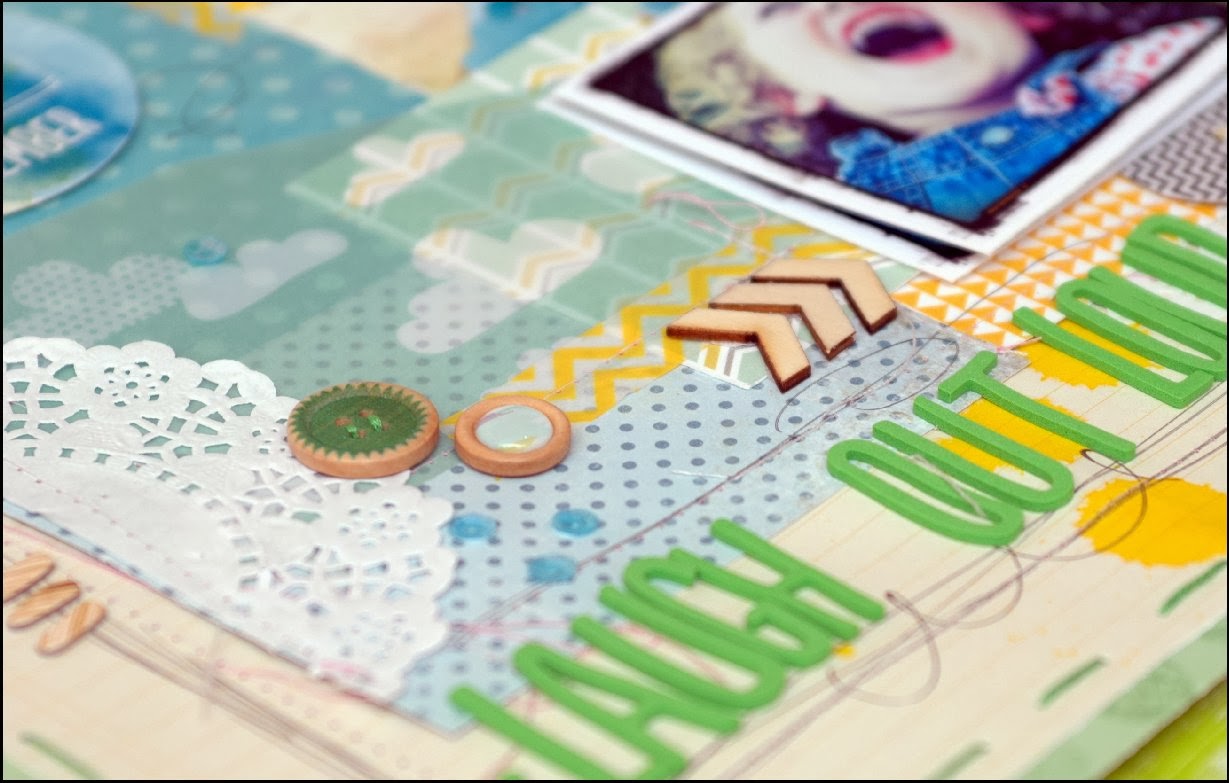
Step 6: Now simple create a layered photo matt with scraps of card-stock and pattern papers. use 3D foam tape for extra dimension. Add plenty of final touches that you love to embellish with. 


and the end result
"laugh"


thanks and i hope you were inspired!


Please Note: Any questions will be answered in the comments section.

how to...collage backgrounds!


Step 1: Gather together a few supplies - scraps of patterned papers, card stock, an assortment of stamps, ink, washi tape, overlays, rub-ons, buttons, doodle pen etc - whatever you think you need for this collage building page.


 Step 2: Layer your base card stock down and trim scraps of patterned paper with scissors and arrange on base. Add some washi tape and overlays. Once happy with arrangement, adhere in place.


Step 3: Gather your stamps and ink and randomly start stamping.

Step 4: Add some machine stitching for extra detail.


Step 5: Adhere your photo  and start adding other embellishments eg: rub-ons, buttons, stickers, title, journaling, random pen doodles, extra stamping etc. 


and the end result
"explore"


thanks and i hope you were inspired!


Please Note: Any questions will be answered in the comments section.

how to...mini albums


Step 1: Gather some supplies together. Scraps of pattern paper,  copy paper, twine, journal tags, buttons, washi tape, distress inks etc. 


Step 2: Trim your pattern paper to measure 5" x 11". Trim the copy paper to measure 4.5" x 10" ( you can do this in bulk all at once).You want the copy paper to be smaller for inside pages. Once trimmed, fold the paper in half and place on the trimmed pattern paper.

Step 3:  Place the book half  way into sewing machine,  use the fold as a guide line and stitch up and down a few times. 


Step 4: Flip book over and grab some twine. Place twine in the middle of book and machine 'zig-zag' twine in place. This is so you can wrap the twine around the book and keep it closed.

Step 5: Now just decorate parts of the mini book with inks, washi tape and tags.

Step 6: Decorate the front with washi tape and a blank journal tag.

Step 7: Decorate twine with buttons and wrap around the book and loop to close.


the end result 
I made two mini books and decorated a few more pages randomly with bags and washi tape and distress inks. 


thanks and i hope you were inspired!


Please Note: Any questions will be answered in the comments section.

how to... graphic backgrounds!


Gather together a few tools...
white card stock, a ruler, pencil, compass, gelatos or watercolor pencils/paints


Step 1: Start anywhere you desire on your base card stock, & using your compass and pencil draw a heap of circles. 


Step 2: Once you have finished creating all your circles, grab your ruler and pencil and draw lines from the centre to the circle edge...as many as you like...


Step 3: Grab your gelato's and start to color in a random number of shapes.


Step 4: Apply water to your finger tips and rub the colors; keep adding water to your fingers to achieve a washed out look. 


Step 5: Allow to dry and then scrap it! 

and the end result
"a ray of sunshine"


thanks and i hope you were inspired!

Please Note: Any questions will be answered in the comments section.

Thursday, November 14, 2013

how to... doodle feathers!


Step 1: COPY and PASTE  this  picture to your computer.
Step 2: PRINT the saved DOODLE IMAGE onto card stock.


Step 3: Using a black gel pen doodle patterns on the feather.
Step 4: Once happy with your doodle designs, cut out.


Step 5: Add a bit of color... whatever medium you like. 


Step 6: Add some machine stitching for extra detail and leave a long thread. 


Step 7: Finish you feather off by hand stitching on a button.
Now all you have to do is create a card or stick it on a page.

 the end result...

"hello and you"


thanks and i hope you were inspired!

Please Note: Any questions will be answered in the comments section.

Saturday, November 9, 2013

how to... simple handmade buttons!

 My first scrappy love is BUTTONS and I love to make my own from all sorts of materials and mediums.
So lets start with those paper collections we all buy. Don't you just love the cover that shows you a sample of each one, now I used to throw that cover sheet out until I realized that I could just use some of my punches to make a few funky buttons to coordinated with my projects.


 Step 1: Gather together assorted shaped punches and hole punch. And any paper sample covers that's lying about.


Step 2: Trim pattern sample cover sheet down. So that it's easier to work with.


Step 3:  Punch out a shape from all the squares. Then use your hole punch and punch a couple of buttons holes.


Now you have a stock pile of funky cool buttons already for you to create your card or layout.
  and here's a page I made using some of the handmade buttons.

"laugh out loud"


Tip: For firmer and  thicker buttons punch out some chipboard the same size and adhere to paper button.

Cheers Leeann Pearce

Please Note: Any questions will be answered in the comments section.